2015-11-19
WebSockets: Writing the Client
 The websockets logo. I think.
We're going to do a little three-part introduction to WebSockets, which provide a way to communicate back and forth with the web server without all the overhead of a standard HTTP connection.
And, in the course of it, we'll be writing a simple chat server and client.
We're going to be piggybacking on the previous blog entry, on writing A NodeJS Webserver. In particular, that webserver will be used for generic webserving on this project, and will also be what the WebSockets run on.
So you might as well start there, if you haven't already.
- Part 0: A NodeJS Webserver
- Part 1: Intro to WebSockets, conceptually
- Part 2: Writing the client side chat code for the browser in JavaScript
- Part 3: Writing the server-side chat code in NodeJS
If you want to jump right on in, get the full source on GitHub.
The Client Side
Now that we have an idea of what WebSockets are, it's time to write the client.
The basic approach is:
-
Make the UI components.
-
Create a new WebSocket object with the destination URL and desired protocol.
 WebSocket URLs will
begin with
WebSocket URLs will
begin with ws://orwss://for encrypted connections. -
Set up listeners for the
open,close,error, andmessageevents on the WebSockets object. -
Write the handlers to handle those events.
Let's start with the UI.
The User Interface
Before we tear into what those handler functions should do, we should probably define the UI they'll be doing it to.
This is a chat program, so let's define the UI to have a chat output area where all the messages go, a text field where you can enter your name, a text field where you enter your chat message, and a "Send" button.
And the HTML looks like this:
<body>
    <div id="chat-output"></div>
    <input type="text" id="chat-username">
    <input type="text" id="chat-input">
    <input type="button" id="chat-send" value="Send">
</body>
Notice that we've given everything a handy ID for reference later.
We'll set the CSS of chat-output to have a good height and
overflow:auto so that it puts scrollbars on as necessary:
#chat-output {
    height: 20ex;
    overflow: auto;
    border: 1px solid gray;
}
And that should give you something that looks like this:
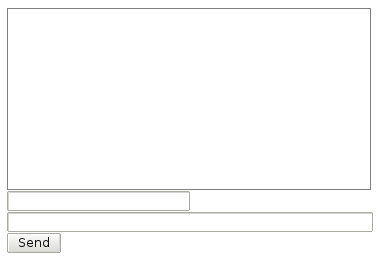 The best, most
well-researched UI in the history of all humanity, I'm sure.
The best, most
well-researched UI in the history of all humanity, I'm sure.
Interfacing with the User Interface (from the program's perspective)
We're going to do a quick diversion on how to interact with the HTML elements in the DOM. We need to be able to get the value of the text inputs so we can send that data to the server. We also need to be able to add stuff to the chat output window and have it automatically scroll down to the bottom when it fills up.
There's a function you can call to get a reference to any one of the DOM
elements, identified by the same selector you use in CSS. For example,
to get a reference to the chat-input field, you can use
querySelector() to get it:
// Get a reference to the DOM element with ID "chat-input"

let chatInput = document.querySelector('#chat-input');
In my code, I have a little helper function to make this a more reasonable length call in practical use:
// Helper function to get an element by ID

function qs(s) {
    return document.querySelector(s);
}
So now I could just call qs('#chat-input') instead of that whole
document-dot thing.
document.querySelector('#foo')works very much like$('#foo')in jQuery.
For the input fields, we use the value property to retrieve the
contents of whatever's in there:
let username = qs('#chat-user').value;
let message = qs('#chat-input').value;
and you can then pass that data over the WebSocket.
For the main chat window with all the messages on it, we do things a
little differently, since it doesn't have a value. (value is only
used on <input> elements, and the chat output window is a <div>.)
To get and set the contents of the chat output window, we'll use its
innerHTML property, which gets or sets whatever HTML is within it. As
a bonus, this means we can decorate the messages that show up in the
chat window with HTML markup to make them italic or bold or whatever.
Any valid HTML can be packed inside.
We'll add a function to write a line of text to the chat output, and
prepend it with a newline if necessary (which we'll represent with an
HTML <br> tag).
First, we get a reference to the output window, chat-output. Then we
get its current contents and store them in innerHTML. We compute the
new output, append it to the previous value in innerHTML, and reassign
it back into the chat-output element.
/**
 * Write something to the output portion of the screen
 */
function writeOutput(s) {
    let chatOutput = qs('#chat-output');
    let innerHTML = chatOutput.innerHTML;

    // Add a newline before new output
    let newOutput = innerHTML === ''? s: '<br/>' + s;

    chatOutput.innerHTML = innerHTML + newOutput;

    // Scroll to bottom
    chatOutput.scrollTop = chatOutput.scrollHeight;
}
And, finally, as you see, there's a bit of magic code at the bottom to set the scrolling position of the window so that the bottom-most content is still displayed. This effectively auto-scrolls the window when content falls off the bottom.
Very Basic WebSocket Skeleton
/**
 * Once the page has loaded
 */
function onLoad() {
    // Create WebSocket
    ws = new WebSocket("ws://localhost:3490, "beej-chat-protocol");

    // Add event listeners
    ws.addEventListener('open', onSocketOpen);
    ws.addEventListener('close', onSocketClose);
    ws.addEventListener('error', onSocketError);
    ws.addEventListener('message', onSocketMessage);
}

// Wait for load event before starting
window.addEventListener('load', onLoad);
And that's all there is to that. The WebSocket will be created, and the events will occur as appropriate.
Now, some of those events happen in an expected order. Firstly, we'd
expect to get an open event before anything else arrives. With the
possible exception of an error event, which means the computer messed
something up, because it's never our fault, right?
let localURL = parseLocation(window.location);

ws = new WebSocket("ws://" + localURL.host, "beej-chat-protocol");
That is, instead of hardcoding it to look at
localhost(which isn't particularly useful for people over the network), we code it up to say, "Open the WebSocket to the same host-and-port I loaded this web page from."What's this
parseLocation()function, though? We code that up using a hackish little trick wherein you set thehrefattribute of an<a>tag with the URL, and let it do the hard work. Once you do that, you can get the host and port from thehostattribute, just like we've done, above./** * Break down a URL into its components */ function parseLocation(url) { let a = document.createElement('a'); a.href = url; return a; }Now, if we were really, really smart, we'd set the protocol to
wss:if thelocalURL.protocolwerehttps:. But that's an exercise for you, dear reader.
onSocketError and onSocketClose implementations
Let's start with these two, since they're the most simple. All we're
going to do is output an appropriate message. So we call writeOutput()
with the appropriate HTML:
/**
 * When the socket errors
 */
function onSocketError(ev) {
    writeOutput("<i>Connection error.<i>");
}
/**
 * When the socket closes
 */
function onSocketClose(ev) {
    writeOutput("<i>Connection closed.<i>");
}
That's it for that. Let's take a small step up in complexity, and try
sending something to the server in our onSocketOpen function.
onSocketOpen Implementation
When the user first connects, they shouldn't be rude by not introducing
themselves. So what we're going to do is send a chat-join message to
our server per our previous article on
protocols.
Assuming the connection goes well, we'll be getting a call to
onSocketOpen(), our event handler for the WebSocket open event.
We'll send out our response then.
/**
 * When the socket opens
 */
function onSocketOpen(ev) {
    writeOutput("<i>Connection opened.</i>");

    sendMessage('chat-join', {
        "username": getChatUsername()
    });
}
As you see, we first write a bit of output just so the user can be tickled pink that the connection has been established. And then we send a message back to the server with our username.
Another option for coding this up would have been to force the user through a login screen ahead of time, but we're trying to keep it as simple as possible for this demo.
What about these other functions, though? Let's get the easy one out of the way:
/**
 * Helper function to get the chat username
 */
function getChatUsername() {
    return qs('#chat-username').value.trim();
}
Note the trim() call there, to strip leading and trailing whitespace.
The server can handle it if there is some, but we're being polite on the
client, as well.
And here's sendMessage(), which takes two
arguments: the message type (a string) and the message payload (an
Object)
/**
 * Send a message to the server
 */
function sendMessage(type, payload) {
	ws.send(makeMessage(type, payload));
}

/**
 * Construct a message
 */
function makeMessage(type, payload) {
	return JSON.stringify({
		'type': type,
		'payload': payload
	});
}
ws.send() is what's going to actually send the data to the server. It
calls a helper function first: makeMessage(). All makeMessage() does
is make an object with the type and payload, and convert it into a
JSON string.
And away we go! The data's on its way to the server!
onSocketMessage implementation
And how do we get data back from the server?
We're going to be getting a JSON string from the server, so first we'll
parse that into a JavaScript Object with JSON.parse().
Then we'll look at the message object's type property to see what kind
of message it is.
Finally, we'll do the Right Thing for the particular message type.
/**
 * When the socket receives a message
 */
function onSocketMessage(ev) {
    let msg = JSON.parse(ev.data);
    let payload = msg.payload;

    // Sanitize HTML string
    let username = escapeHTML(payload.username);

    switch (msg.type) {
        case 'chat-message':
            writeOutput('<b>' + username + ":</b> " +
                escapeHTML(payload.message));
            break;

        case 'chat-join':
            writeOutput('<i><b>' + username +
                '</b> has joined the chat.</i>');
            break;

        case 'chat-leave':
            writeOutput('<i><b>' + username +
                '</b> has left the chat.</i>');
            break;
    }
}
All looking good? What's that escapeHTML() call?
This is actually pretty important. See, we're putting HTML we're getting from the server right on the screen, and the server's getting it right from other users. The browser will happily inject whatever HTML it gets, and will execute it.
The last thing you need is an attacker sending you a chat message that reads, "!!" and having your browser execute it instead of displaying it on the screen.
The solution to this problem is to translate all the HTML special characters into their associated HTML entities. At the very least, the following should be done (starting with the first one):
&becomes&<becomes<>becomes>
Paranoid people also recommend:
'becomes'"becomes"/becomes/
And we do that with this horribly inefficient function:
/**
* Escape HTML special characters
*/
function escapeHTML(s) {
return s.replace(/&/g, '&')
.replace(/</g, '<')
.replace(/>/g, '>')
.replace(/'/g, ''')
.replace(/"/g, '"')
.replace(/\//g, '/');
}
General rule: Anything that you are going to stick into your page
as HTML that you get from an untrusted source needs to be sanitized
through a function like escapeHTML(). Every time.
Finally, the Keyboard Input
Sooner or later, we have to actually be able to type and send things, or else we'll not have any fun.
Well, we have a "Send" button, so let's get clicks on that by adding an
event listener in our onLoad() handler:
qs('#chat-send').addEventListener('click', send);
And that'll call the handy-dandy send() function:
/**
 * Send a chat message
 */
function send() {
    sendMessage('chat-message', {
        "username": getChatUsername(),
        "message": getChatMessage()
    });

    // Clear the input field after sending
    qs('#chat-input').value = '';
}
As you can see, this sends the actual chat username and message out, and clears the input field for the next call.
First, we'll add a
keyupevent listener to the text input field, so that we get an event every time a key is released. We'll add that in theonLoad()handler:qs('#chat-input').addEventListener('keyup', onChatInputKeyUp);Then
onChatInputKeyUpwill look to see if the user hit the return key, and then callsend()to send off the current contents of the text input (just as if the user had hit the "Send" button)./** * Make [RETURN] the same as the send button for convenience */ function onChatInputKeyUp(ev) { if (ev.keyCode === 13) { // 13 is RETURN send(); } }To test for keycodes with your keyboard, visit keycode.info.
Shortcomings and Room for Improvement
Since this is just a toy program, there are definitely a few things wrong with it.
First of all, the usernames are sent in a very ungainly way that (as you'll see) makes it difficult for the server to keep track of names. It would be better to have the user log in and pass a username packet to the server. And then if they changed their name, pass a new username packet.
Secondly, you can trivially impersonate anyone by entering their username.
Also, even if you stopped that, there's nothing in the packet structure to prevent other people from impersonating you. Eventually, the server would have to keep track of you by unique user ID if you wanted to mitigate that.
Obviously the UI is horrible.
The code isn't structured in a way that makes it easy to start new instances of chat windows. I could imagine a case where you might want multiple chat windows per page, so you could refactor to code to support this.
And there are plenty of other bonus shortcomings I'm too tired to think of right now, I'm sure.
Up Next
The only remaining piece in the series is the WebSockets server side, so we'll tackle that last. See you then!
Continue to Part 3: Writing the Server
Links
License
The code attached to this article is licensed under the MIT open source license.